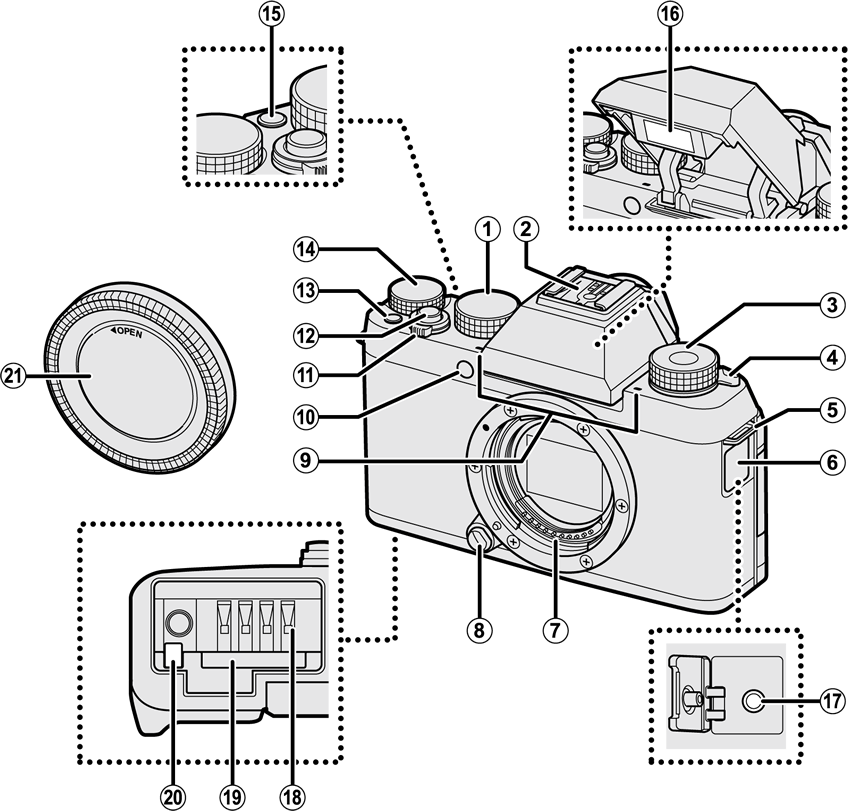
Mode dial
Hot shoe
Fn (function) dial
N (flash pop-up) lever
Strap eyelet
Connector cover
Lens signal contacts
Lens release button
Microphone
AF-assist illuminator
Self-timer lamp
ON/OFF switch
Shutter button
t (movie recording) button
Main command dial
Fn (function) button
Flash
Microphone/remote release connector (Φ2.5 mm)
Battery chamber
Memory card slot
Battery latch
Body cap
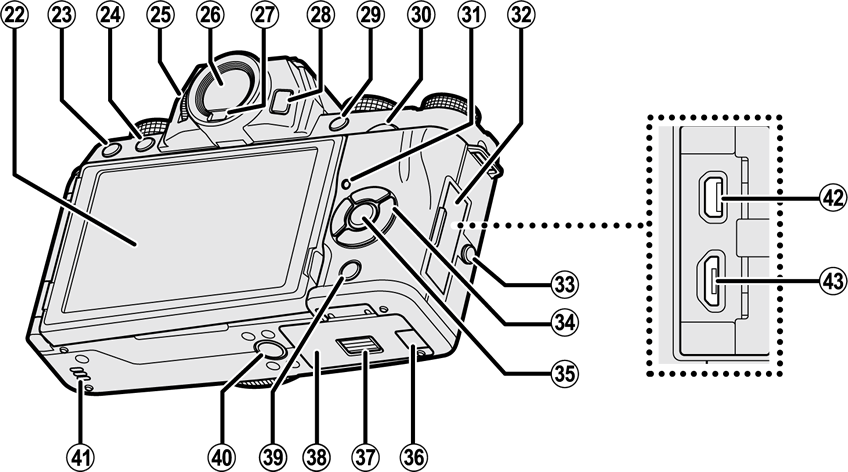
LCD monitor
Touch screen
b Delete button
a (playback) button
Diopter adjustment control
Electronic viewfinder (EVF)
Eye sensor
VIEW MODE button
Q (quick menu) button
RAW conversion button (playback mode)
Sub-command dial
Indicator lamp
Connector cover
Screw cap
Selector
MENU/OK button
X (control lock) button (press and hold)
Cable channel cover for DC coupler
Battery-chamber cover latch
Battery-chamber cover
DISP (display)/BACK button
Tripod mount
Speaker
HDMI Micro connector (Type D)
Micro USB (Micro-B) USB 2.0 connector
To select a shooting mode, rotate the dial until the icon for the desired mode aligns with the index.
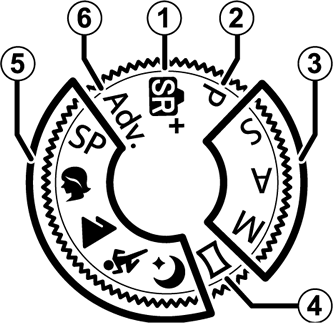
| Mode | Description |
|---|---|
| The camera automatically optimizes settings to the scene. | |
| Aperture and shutter speed can be adjusted using program shift. | |
| Select for full control over camera settings, including aperture (M and A) and/or shutter speed (M and S). | |
| Follow an on-screen guide to create a panorama. | |
| Choose a scene suited to the subject or shooting conditions and let the camera do the rest. | |
| Take photos with filter effects. |
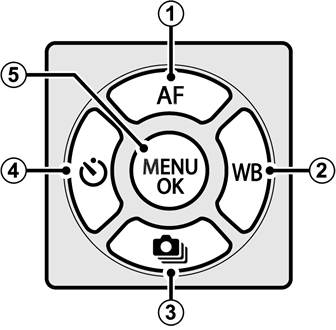
Use the efgh buttons to highlight items or access camera functions.
Move cursor up (e)
AF (autofocus) button
Move cursor right (h)
WB (white balance) button
Move cursor down (f)
I (burst shooting) button
Move cursor left (g)
h (self-timer) button
MENU/OK button
Control Lock
To prevent accidental operation of the selector and Q button during shooting, press MENU/OK until X is displayed. The controls can be unlocked by pressing MENU/OK until X is no longer displayed.
Do not remove the serial number plate, which provides the FCC ID, KC mark, serial number, and other important information.
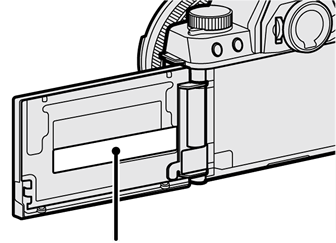
Serial number plate
The main and sub-command dials are used for the operations listed below.
|
Rotate |
Exposure compensation Choose a shutter speed Adjust settings in the quick menu View other pictures during playback |
|---|
|
Rotate |
Program shift Choose a shutter speed Adjust aperture 1 Adjust power zoom when the monitor is opened horizontally to approximately 180° for self-portraits (“selfies”) 2 Adjust settings in the quick menu Zoom in or out in full frame playback Zoom in or out in multi-frame playback |
|---|---|
|
Press |
Zoom in on selected focus point In manual focus mode, press and hold to choose cMF ASSIST options Release the shutter when the monitor is opened horizontally to approximately 180° for self-portraits (“selfies”) Zoom in on the active focus point during playback |
1 Use aperture ring to adjust aperture.
2 Power zoom lens attached and ON selected for T ELECTRONIC ZOOM SETTING.
Rotate the function dial to quickly adjust settings for the assigned function during shooting.
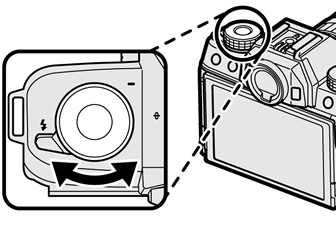
At shipment, the dial is assigned the DEFAULT role. At this setting, the function performed by the dial varies with the position of the mode dial.
| Mode | Description |
|---|---|
| Adv. (ADVANCED FILTER) | Filter selection |
| SP (SCENE POSITION) | Scene selection |
| S (ADVANCED SR AUTO)/M/N/O | Self-timer |
| h | Portrait enhancer level selection |
|
P (PROGRAM AE) S (SHUTTER PRIORITY AE) A (APERTURE PRIORITY AE) M (MANUAL) u (PANORAMA) |
Film simulation |
The role performed by the function dial can be chosen using hBUTTON SETTING > FUNCTION (Fn) SETTING (a Assigning a Role to the Function Button).
The indicator lamp shows camera status as follows:
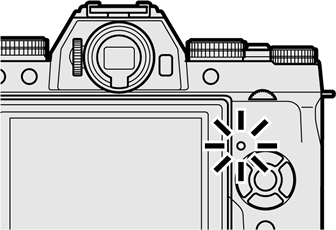
| Indicator lamp | Camera status |
|---|---|
| Glows green | Focus locked. |
| Blinks green | Focus or slow shutter speed warning. Pictures can be taken. |
| Blinks green and orange |
Camera on: Recording pictures. Additional pictures can be taken. Camera off: Uploading pictures to a smartphone or tablet. |
| Glows orange | Recording pictures. No additional pictures can be taken at this time. |
| Blinks orange | Flash charging; flash will not fire when picture is taken. |
| Blinks red | Lens or memory error. |
Warnings may also appear in the display.
The LCD monitor can be reversed for self-portraits (a Self-Portraits (Selfies)) or tilted for ease of viewing, but be careful that your fingers and other objects do not get caught between the monitor and the camera body and avoid touching the wires behind the display. Touching the wires could cause camera malfunction.
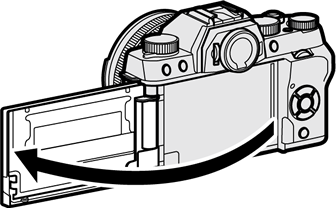
The LCD monitor also functions as a touch screen (a Touch Screen Mode).
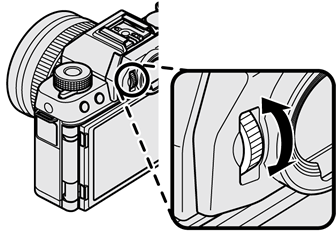
If the indicators displayed in the viewfinder are blurred, put your eye to the viewfinder and rotate the diopter adjustment control until the display is in sharp focus.
