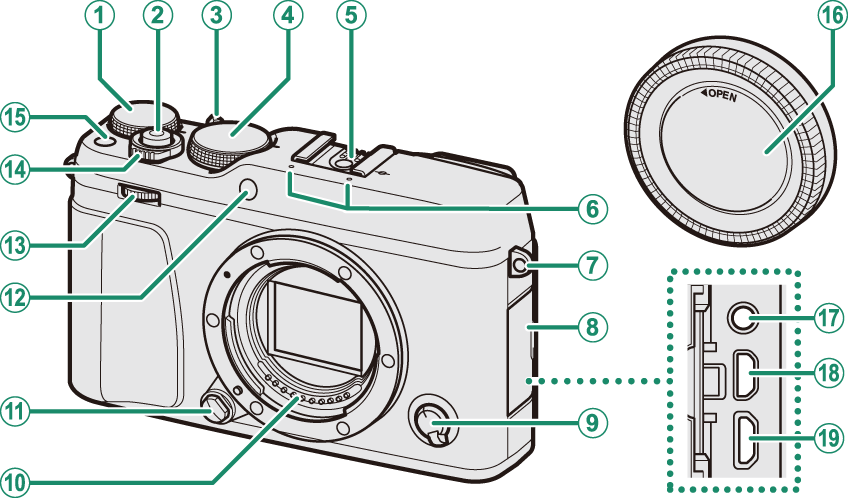
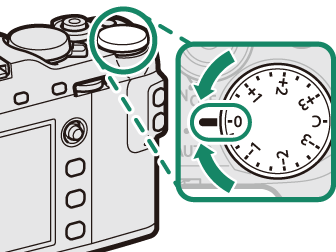
Exposure compensation dial
Shutter button
Auto mode selector lever
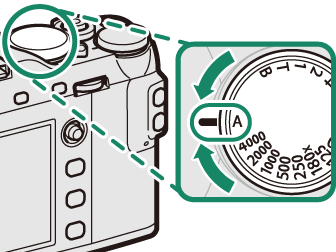
Shutter speed dial
Hot shoe
Microphone
Strap eyelet
Connector cover
Focus mode selector
Lens signal contacts
Lens release button
AF-assist illuminator
Self-timer lamp
Front command dial
ON/OFF switch
Function button (Fn1)
Body cap
Microphone/remote release connector (Φ 2.5 mm)
HDMI Micro connector (Type D)
Micro USB (Micro-B)
USB 2.0 connector
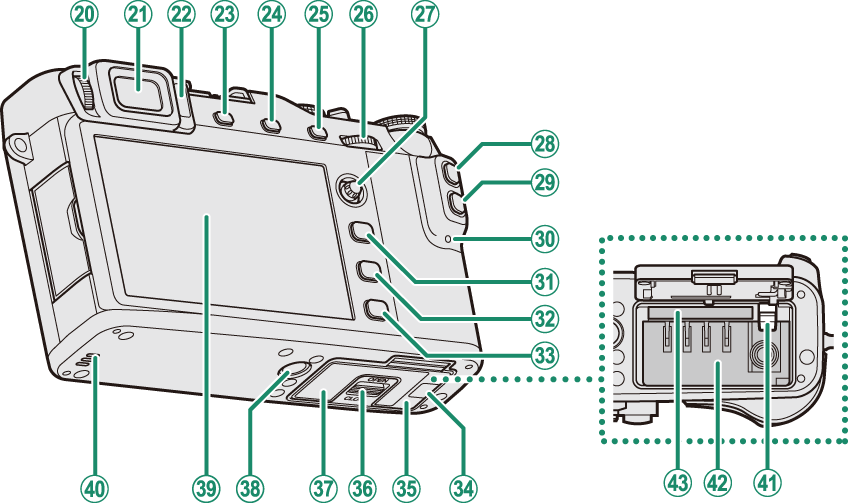
Diopter adjustment control
Electronic viewfinder (EVF)
Eye sensor
VIEW MODE button
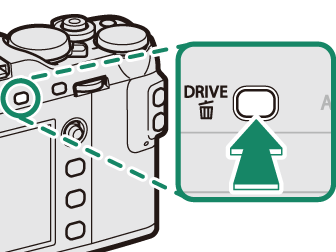
DRIVE button
(delete) button (playback mode)
AE-L (exposure lock) button
Rear command dial
Focus stick (focus lever)
AF-L (focus lock) button
Q (quick menu) button
Indicator lamp
MENU/OK button
DISP (display)/BACK button
(playback) button
Cable channel cover for DC coupler
Battery-chamber cover
Battery-chamber cover latch
Serial number plate
Tripod mount
LCD monitor
Speaker
Battery latch
Battery chamber
Memory card slot
Do not remove the serial number plate, which provides the FCC ID, KC mark, serial number, and other important information.
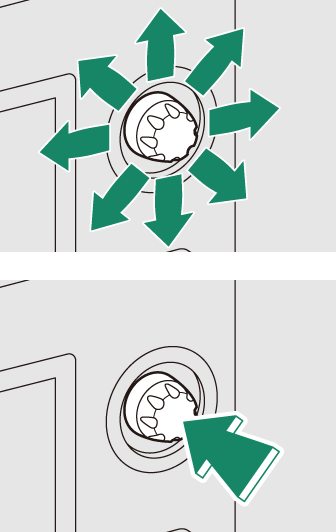
Tilt or press the focus stick to select the focus area. The focus stick can also be used to navigate the menus.
The shutter speed dial is used to choose the shutter speed.
Rotate the dial to choose an exposure compensation amount.
Pressing the DRIVE button displays drive mode options, where you can choose from the following the drive modes.
| Mode | ||
|---|---|---|
| STILL IMAGE ( |
||
| CONTINUOUS ( |
||
| AE BKT ( |
||
| ISO BKT ( |
||
| FILM SIMULATION BKT ( |
||
| WHITE BALANCE BKT ( |
||
| DYNAMIC RANGE BKT ( |
||
| Adv. | MULTIPLE EXPOSURE ( |
|
| PANORAMA ( |
||
| ADVANCED FILTER ( |
||
| MOVIE ( |
||
Switch between auto and manual modes.
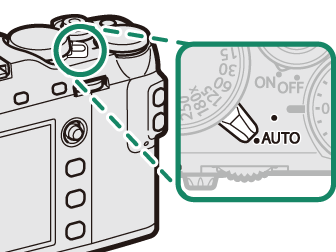
| Position | Mode |
|---|---|
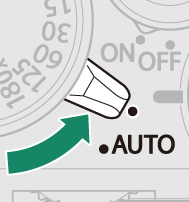 |
Select from P (program AE), S (shutter-priority AE), A (aperture-priority AE), and M (manual) modes. Adjust shutter speed and aperture using program shift (mode P) or set shutter speed and/or aperture manually (modes S, A, and M). |
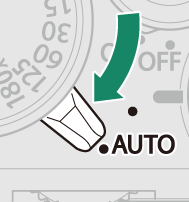 |
Auto mode. The camera adjusts settings automatically according to the option selected by rotating the
front command dial. Choose from modes suited to specific subject types, or select |
Restrictions may apply to camera settings depending on the mode and shooting conditions.
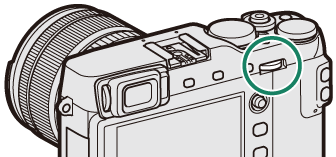
Rotate or press the command dials to perform the operations listed below.

|
Rotate |
Select menu tabs or page through menus. Adjust aperture. Select a scene when shooting in auto mode. Select an advanced filter when shooting with Adjust exposure compensation when C is selected with exposure compensation dial. Adjust sensitivity (ON selected for ISO COMMAND DIAL SETTING). View other pictures during playback. |
|---|---|
|
Press |
Switch back and forth between aperture and exposure compensation when C is selected with the exposure compensation dial, or between aperture, exposure compensation, and sensitivity when C is selected with the exposure compensation dial and ISO COMMAND SETTING is ON. |
|
Rotate |
Highlight menu items. Choose the desired combination of shutter speed and aperture (program shift). Choose a shutter speed. Adjust settings in the quick menu. Choose the size of the focus frame. Zoom in or out during focus zoom or in full frame or multi-frame playback. |
|---|---|
|
Press |
Perform the function assigned to the DIAL function button. Press and hold to choose the manual focus mode focus display. Zoom in on the active focus point during playback. |
When the viewfinder is not in use, camera status is shown by the indicator lamp.
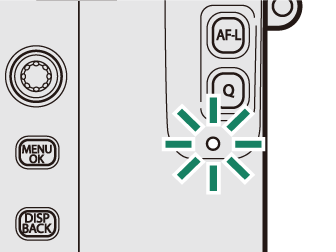
| Indicator lamp | Camera status |
|---|---|
| Glows green | Focus locked. |
| Blinks green | Focus or slow shutter speed warning. Pictures can be taken. |
| Blinks green and orange |
Camera on: Recording pictures. Additional pictures can be taken. Camera off: Uploading pictures to a smartphone or tablet. |
| Glows orange | Recording pictures. No additional pictures can be taken at this time. |
| Blinks orange | Flash charging; flash will not fire when picture is taken. |
| Blinks red | Lens or memory error. |
Warnings may also appear in the display.
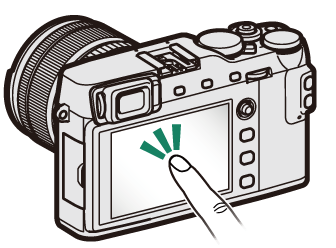
The LCD monitor also functions as a touch screen that can be used for:
Touch photography
Focus area selection
Function selection
Full-frame playback
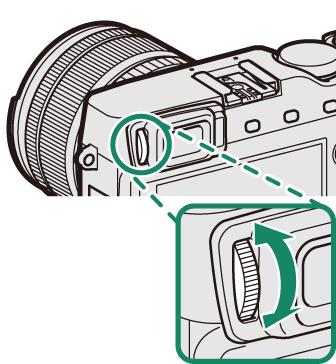
The camera is equipped with diopter adjustment in the range −4 to +2 m–1 to accommodate individual differences in vision. Rotate the diopter adjustment control until the viewfinder display is in sharp focus.
