Parts of the Camera
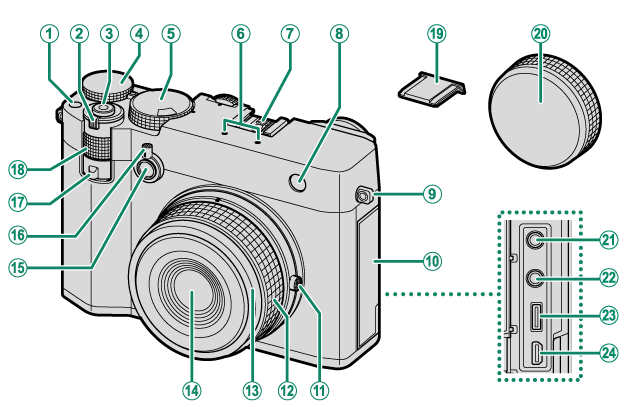
AFn1 button
BON/OFF switch
CShutter button
DExposure compensation dial
EShutter speed dial/Sensitivity dial
FMicrophone
GHot shoe
HAF-assist illuminator
Self-timer lamp
Tally light
IStrap eyelet
JConnector cover
KAperture ring
LControl ring
Focus ring
MFront ring (detachable)
NLens
OFn2 button
PControl lever
QDigital tele-converter selector
RFront command dial
SHot shoe cover
TLens cap
UMicrophone/remote release connector (φ3.5mm)
VHeadphone jack (φ3.5mm)
WUSB connector (Type-C)
XHDMI Micro connector (Type D)
U Use of an optional RR-100 remote release requires a third-party adapter to convert the three-pin, φ2.5 mm connector to a three-pin, φ3.5 mm connector.
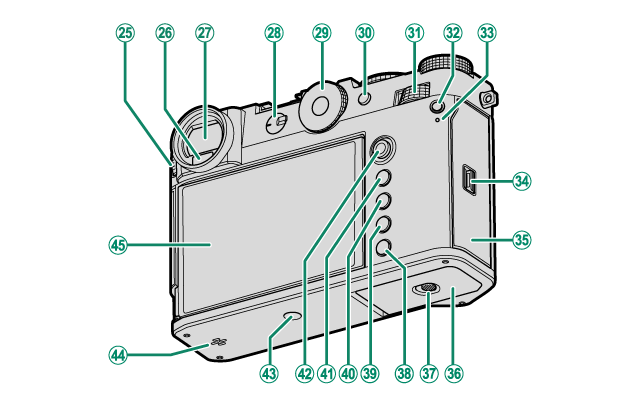
YDiopter adjustment control
ZEye sensor
aElectronic viewfinder (EVF)
bFocus mode selector
cAspect ratio dial
dAEL (exposure lock)/AFL (focus lock) button
eRear command dial
fQ (quick menu) button
gIndicator lamp
Tally light
hMemory card slot cover latch
iMemory card slot cover
jBattery-chamber cover
kBattery-chamber cover latch
lDRIVE/DELETE button
mPLAY (playback) button
nDISP (display)/BACK button
oMENU/OK button
pFocus stick (focus lever)
qTripod mount
rSpeaker
sLCD monitor
Touch screen
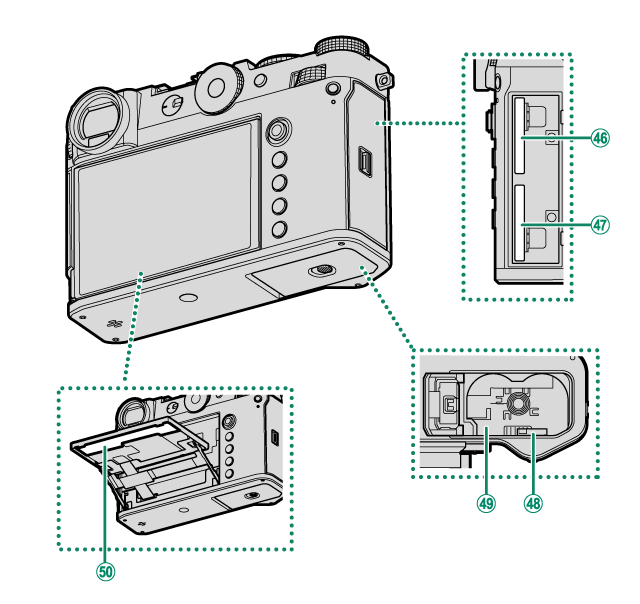
tMemory card slot 2
uMemory card slot 1
vBattery latch
wBattery chamber
xSerial number plate
- The Serial Number Plate
- The Focus Stick (Focus Lever)
- The Shutter Speed Dial/Sensitivity Dial
- The Exposure Compensation Dial
- The DRIVE/DELETE Button
- The Digital Tele-Converter Selector
- The Aspect Ratio Dial
- The Control Lever
- The Control Ring
- The Command Dials
- The Indicator Lamp
- The LCD Monitor
- Focusing the Viewfinder
The Serial Number Plate
Do not remove the serial number plate, which provides the CMIIT ID, serial number, and other important information.
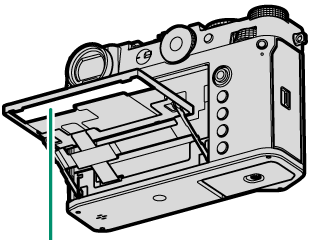
Serial number plate
The Focus Stick (Focus Lever)
Tilt or press the focus stick to select the focus area. The focus stick can also be used to navigate the menus.
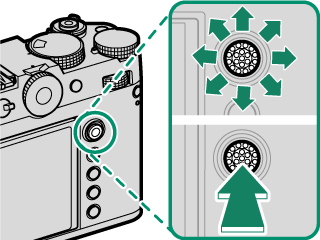
To choose the role played by the focus stick, press and hold the center of the stick or use DBUTTON/DIAL SETTING > FOCUS LEVER SETTING.
Use GAF/MF SETTING > xFWRAP FOCUS POINT to choose whether focus-area selection is bounded by the borders of the display or “wraps around” from one edge of the display to another.
The Shutter Speed Dial/Sensitivity Dial
Shutter speed can be adjusted by rotating the shutter speed dial/sensitivity dial. Lift and rotate the dial to adjust sensitivity.
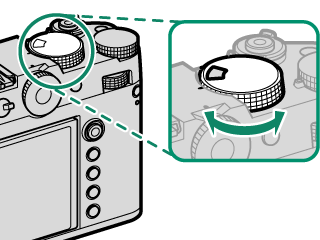
Shutter speed
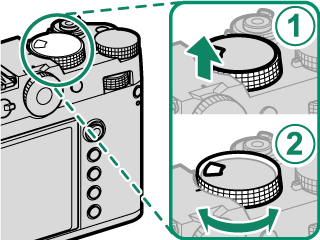
Sensitivity
Sensitivity
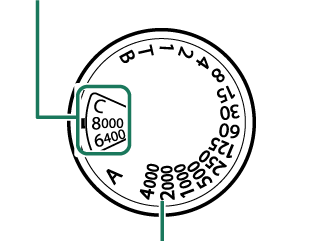
Shutter speed
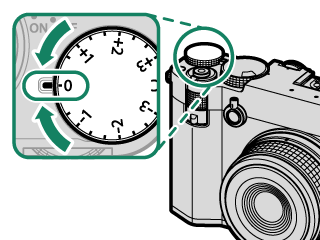
The Exposure Compensation Dial
Rotate the dial to choose an exposure compensation amount.
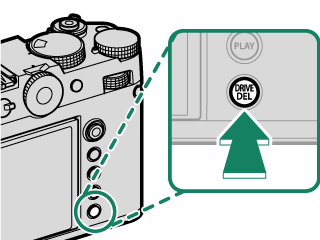
The DRIVE/DELETE Button
Pressing the DRIVE/DELETE button displays drive-mode menu, where you can choose from the following the drive modes.
| Mode | |
|---|---|
| B | Single frame |
| J | High-speed burst |
| O | Low-speed burst |
| W | ISO BKT |
| Mode | |
|---|---|
| V | WHITE BALANCE BKT |
| s | Bracketing |
| j | Multiple exposure |
| F | MOVIE |
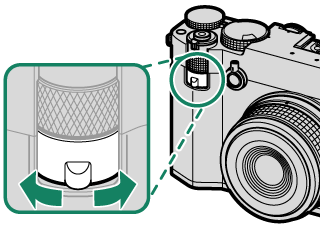
The Digital Tele-Converter Selector
Use the digital tele-converter selector to change the magnification of the digital teleconverter.
| Options | |||
|---|---|---|---|
| 80mm(63mm) | 63mm(50mm) | 45mm(36mm) | OFF |
* The values in parentheses are 35mm format equivalent. OFF corresponds to 28mm.
Digital teleconverter settings can also be changed via ASHOOTING SETTING > DIGITAL TELE-CONV. in the photo menu.
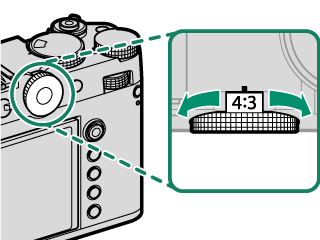
The Aspect Ratio Dial
Rotate the aspect ratio dial to change the aspect ratio during still photography.
| Options | ||||
|---|---|---|---|---|
| 4:3 | 3:2 | 16:9 | 65:24 | 17:6 |
| 3:4 | 1:1 | 7:6 | 5:4 | C |
When set to C, rotate the command dial to change the aspect ratio (aThe Command Dials).
Aspect Ratio
Changes in the aspect ratio change the position and size of the black area that indicates the outside of the cropped area.
Screen Samples
The Control Lever
Pull the control lever left or right or pull and hold it to make the followings possible.
aSwitching between the EVF and LCD
aDisplaying CONTROL RING SETTING
aChanging the display of the cropping indicators
The control lever can be assigned other roles using DBUTTON/DIAL SETTING > FUNCTION (Fn) SETTING. Control lever functions can also be assigned to other function buttons (aFunction Controls).
Switching Between the EVF and LCD
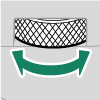
Pull the control lever as shown to switch between the EVF and LCD (aChoosing a Display Mode).
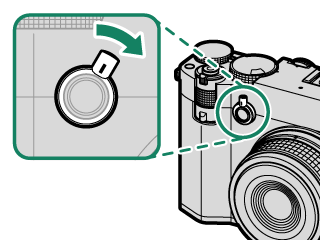
Pull towards the lens
Displaying CONTROL RING SETTING
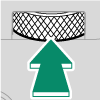
Pull and hold the control lever as shown to display CONTROL RING SETTING.

Pull and hold towards the lens
Changing the Display of the Cropping Indicators
Pull the control lever as shown during still photography to make the black area that indicates the outside of the cropped area semi-transparent or to display the cropped area within a frame, according to the aspect ratio.
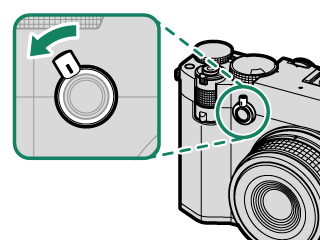
Pull towards the grip
The display of the cropping indicators can also be changed via DSCREEN SET-UP > SURROUND VIEW.
Setting the display to SEMI-TRANSPARENT or LINE while using a digital tele-converter allows you to check the cropped area without enlarging the screen display.

Displaying xFND FILTER
Pull and hold the control lever as shown to display xFND FILTER.

Pull and hold towards the grip
The Control Ring
Use the control ring for quick access to camera functions during shooting. The function assigned to the control ring can be selected using DBUTTON/DIAL SETTING > CONTROL RING SETTING. Choose from:
- WHITE BALANCE
- FILM SIMULATION
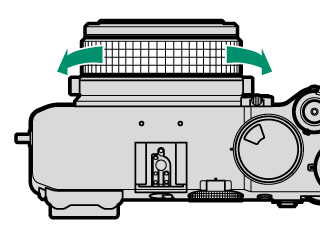
Regardless of the option selected, when M (manual) is chosen with the focus mode selector, the control ring can be used only for manual focus.
The Command Dials
Rotate or press the command dials to:
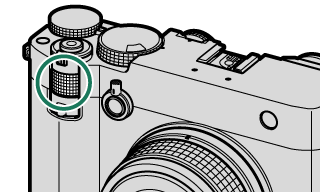
|
Rotate |
|
|---|---|
|
Press |
— |
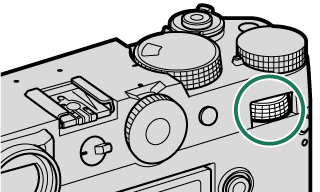
|
Rotate |
|
|---|---|
|
Press |
|
* Available only if FOCUS CHECK is assigned to a function button.
The rotation direction for the command dials can be selected using DBUTTON/DIAL SETTING > COMMAND DIAL DIRECTION.
Choosing a Function for the Front Command Dial
Press the Fn2 button during shooting to choose a function assigned in DBUTTON/DIAL SETTING > COMMAND DIAL SETTING.
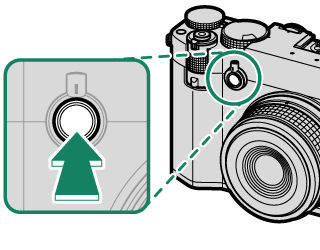

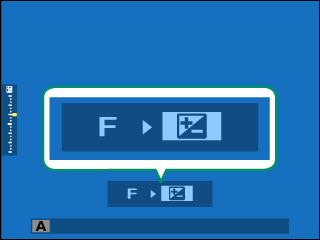
The following functions can be assigned.
| Function | Description |
|---|---|
| S.S. (PROGRAM SHIFT) | Select a shutter speed. Program shift is possible in mode P. |
| APERTURE | Adjust aperture when the aperture setting is A (auto) and DBUTTON/DIAL SETTING > APERTURE RING SETTING (A) is COMMAND. |
| EXPOSURE COMPENSATION | Adjust exposure compensation when the exposure compensation dial is set to C. |
| ISO | Adjust sensitivity when the sensitivity dial is set to C. |
| ASPECT RATIO | When C is chosen with the aspect ratio dial, the aspect ratio can be set during still photography. |
The Fn2 button can be assigned other roles using DBUTTON/DIAL SETTING > FUNCTION (Fn) SETTING. The button to be used can also be changed (aFunction Controls).
Depending on the shooting mode or drive mode, some functions cannot be assigned or may be disabled even if they have been assigned.
Choosing a Function for the Rear Command Dial
Values of the functions assigned by REAR COMMAND DIAL in DBUTTON/DIAL SETTING > COMMAND DIAL SETTING can be adjusted by the rear command dial during shooting. The following functions can be assigned to the dial.
| Function | Description |
|---|---|
| S.S. (PROGRAM SHIFT) | Select a shutter speed. Program shift is possible in mode P. |
| APERTURE | Adjust aperture when the aperture setting is A (auto) and DBUTTON/DIAL SETTING > APERTURE RING SETTING (A) is COMMAND. |
| EXPOSURE COMPENSATION | Adjust exposure compensation when the exposure compensation dial is set to C. |
| ISO | Adjust sensitivity when the sensitivity dial is set to C. |
| ASPECT RATIO | When C is chosen with the aspect ratio dial, the aspect ratio can be set in photo mode. |
Depending on the shooting mode or drive mode, some functions cannot be assigned or may be disabled even if they have been assigned.
The Indicator Lamp
Camera status is shown by the indicator lamp.
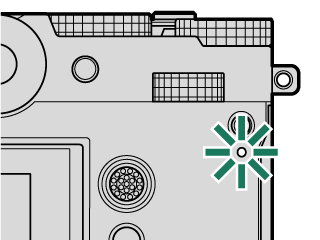
| Indicator lamp | Camera status |
|---|---|
| Glows green | Focus locked. |
| Blinks green | Focus or slow shutter speed warning. Pictures can be taken. |
| Blinks green and orange | Camera on: Recording pictures, or picture displayed for confirmation after being taken with option other than OFF selected for DSCREEN SET-UP > IMAGE DISP. (additional pictures can be taken). |
| Camera off: Uploading pictures to a smartphone or tablet. * | |
| Glows orange | Recording pictures. No additional pictures can be taken at this time. |
| Blinks red | Lens or memory error. |
* Displayed only if pictures are selected for upload.
Warnings may also appear in the display.
The indicator lamp remains off while your eye is to the viewfinder.
The BMOVIE SETTING > TALLY LIGHT option can be used to choose the lamp (indicator or AF-assist) that lights during movie recording and whether the lamp blinks or remains steady.
The indicator lamp blinks green whenever the displays are off during interval-timer photography.
The indicator lamp shows the status of its connection to computers, Frame.io, and the like.
The LCD Monitor
The LCD monitor can be tilted for easier viewing, but be careful not to touch the wires or trap fingers or other objects behind the monitor. Touching the wires could cause camera malfunction.
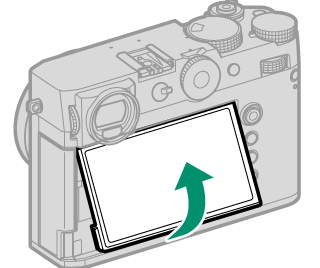
The LCD monitor also functions as a touch screen that can be used for:
aEVF
Focusing the Viewfinder
Viewfinder focus can be adjusted by rotating the diopter adjustment control.
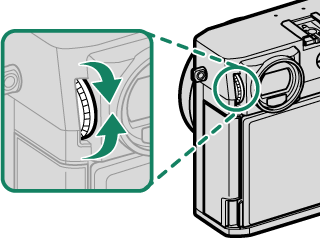

 .
.


