.
.PL-Mount Adapter
Replacing the Shim on the PL-Mount Adapter
Replace the shim with one that is appropriate for the lens you use.
Do not touch the shims with your hands.
Shims of the following thicknesses are supplied:
0.01 mm / 0.025 mm / 0.038 mm / 0.05 mm / 0.075 mm / 0.125 mm
The PL-mount adapter comes with a 0.1 mm thick shim built in at the factory.
Hex wrenches with the following dimensions are supplied:
1.5 mm / 2 mm / 3 mm
-
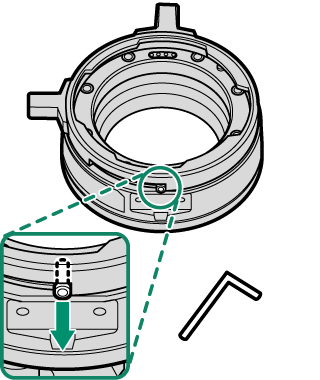
Remove the bayonet ring.
Use the supplied hex wrench (1.5 mm) to remove the stopper screw.
-
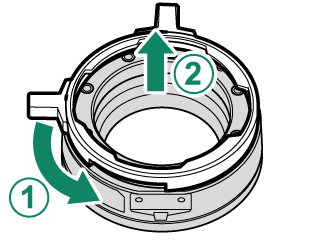
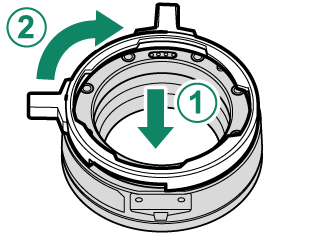
Rotate the bayonet ring counterclockwise (A) and remove it (B).
-
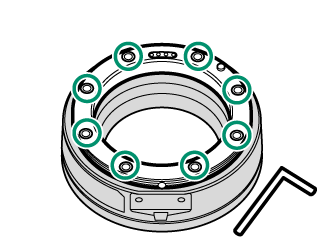
Use the supplied hex wrench (2 mm) to remove eight screws.
-
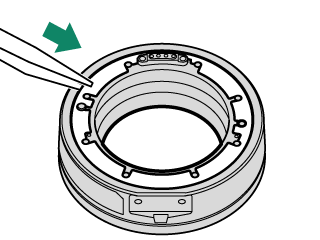
Remove the lens mount and remove the shim with tweezers.

-
Select the shim appropriate for the lens you are using and attach it with tweezers.
Attach the shims in order of thickness, starting with the thinnest shim and ending with the thickest shim.
-
Attach the lens mount.
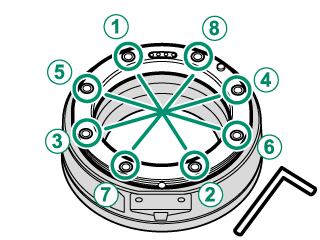
Use the supplied hex wrench (2 mm) to install the eight screws diagonally in the order shown in the figure. Lightly tighten the eight screws.
-
Retighten the eight screws in the order as in Step 6.
Use the supplied hex wrench (2 mm) to tighten the screws. When using a torque wrench, set the torque to 0.36 N·m.
-
Attach the bayonet ring to the PL-mount adapter (A) and rotate it clockwise until it stops (B).
-
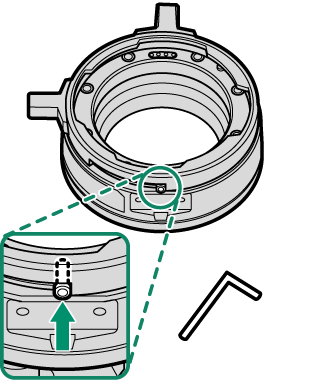
Rotate it counterclockwise about halfway until the stopper screw hole is visible and use the supplied hex wrench (1.5 mm) to attach the stopper screw.
Maximum Dimensions of PL-mount Lenses
When using PL-mount lenses, use only lenses that do not exceed the following dimensions to avoid injury and damage to the camera and lenses.