.
.Attaching a Lens
The camera can be used with the FUJIFILM G-mount lenses manufactured by Fujifilm and PL-mount lenses.
Observe the following precautions when attaching or removing (exchanging) lenses.
- Check that the lenses are free of dust and other foreign matter.
- Do not change lenses in direct sunlight or under another bright light source. Light focused into the interior of the camera could cause it to malfunction.
- Attach the lens caps before exchanging lenses.
- Do not rotate the lens while holding moving parts of the camera, such as the aperture ring.
- See the manual provided with the lens for information on use.
- Be careful not to touch the camera's internal parts.
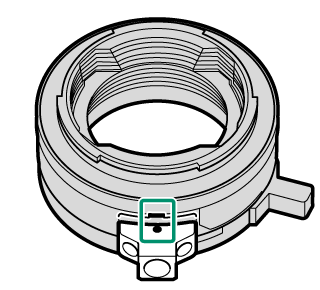
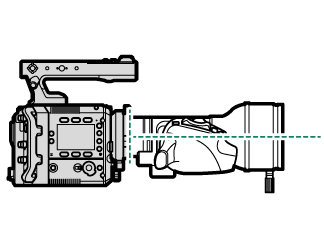
G-mount Lenses
-
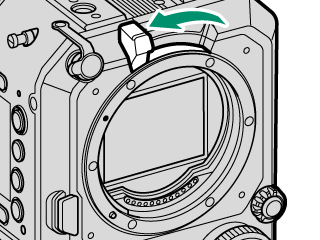
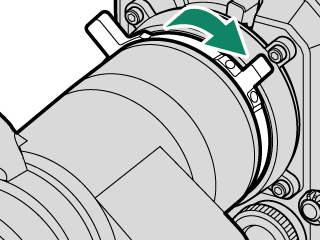
Tilt the lens lock lever as shown in the figure.
-
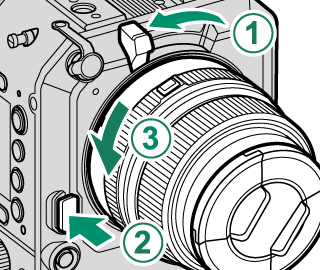
Remove the body cap from the camera and the rear cap from the lens. Place the lens on mount, keeping the marks on the lens and camera aligned (A), and then slowly rotate the lens in the direction of the arrow until it clicks into place (B).
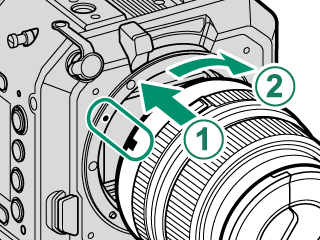
Rotate the lens until it clicks securely into place.
Do not press the lens release button while attaching the lens.
-
Move the lens lock lever as shown in the figure to lock the lens.
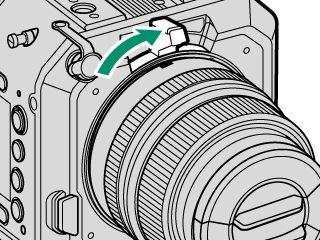
Do not press the lens lock lever too hard as it will not move all the way to the end.
Removing Lenses
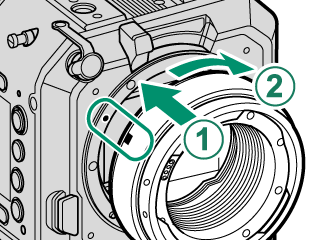
Turn the camera off, then tilt the lens lock lever as shown in the figure (A), and while pressing the lens release button (B), slowly rotate the lens in the direction of the arrow (C).
To prevent dust accumulating on the lens or inside the camera, replace the lens caps and camera body cap when the lens is not attached.
Lenses and Other Optional Accessories
The camera can be used with lenses and accessories for the FUJIFILM G-mount.
PL-mount Lenses
When using a PL-mount lens, attach the supplied PL-mount adapter to the camera. For compatibility information on our separately sold PL-mount lenses, visit the following web site.
When using PL-mount lenses other than those mentioned above, note the following:
- We do not guarantee the operation of all PL-mount lenses.
- To prevent damage to the camera or lens, use lenses that do not exceed the specified dimensions (aMaximum Dimensions of PL-mount Lenses).
- To adjust the flange focal length, use the supplied shim (aReplacing the Shim on the PL-Mount Adapter).
Attaching the PL-mount Adapter
Attach the PL-mount adapter to the camera.
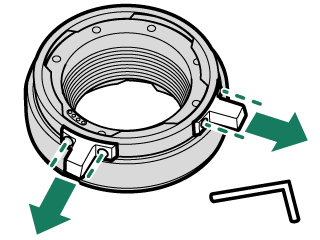
-
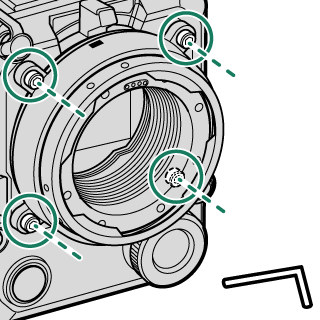
Remove the PL lock levers from the bayonet ring.
Use the supplied hex wrench (2 mm).
-
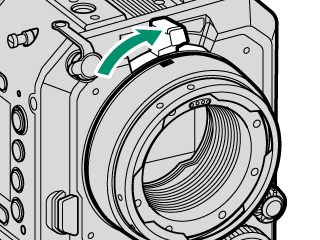
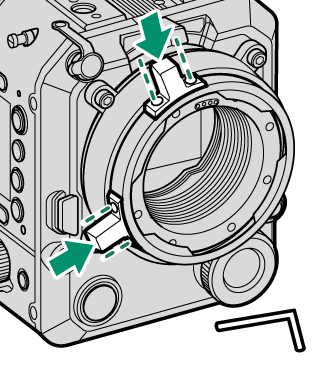
Tilt the lens lock lever as shown in the figure to release the lock.
-
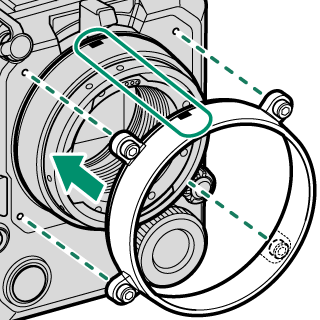
Align the red indicators on the camera and the PL-mount adapter (A), and then slowly rotate the PL-mount adapter in the direction of the arrow to attach it (B).
-
Move the lens lock lever as shown in the figure to lock the adapter.
Do not press the lens lock lever too hard as it will not move all the way to the end.
-
Align the red indicators on the PL-mount adapter cover and the PL-mount adapter, and then attach the PL-mount adapter cover.
The PL-mount adapter cover cannot be used with other GFX series cameras.
-
Tighten the bolts on the PL-mount adapter cover to secure it to the camera.
Use the supplied hex wrench (3 mm) to tighten the bolts. When using a torque wrench, set the torque to 0.36 N·m.
-
Attach the PL lock levers to the bayonet ring.
Use the supplied hex wrench (2 mm).
Attaching the PL-mount Lenses
Attach the lens to the PL-mount adapter.
When attaching a heavy lens (2 kg or more), use an optional lens support. Using a lens support will prevent the weight of the lens from affecting the flange focal length and will also reduce the load on the lens mount (aAttaching the Camera to the Support Rod).
-
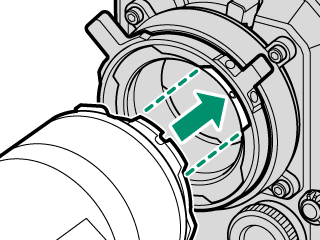
Attach the lens straight to the camera so that the pin on the PL-mount adapter aligns with the notch on the lens.
Do not rotate the lens while it is pushed at an angle or it is attached to the PL-mount adapter. Failure to observe this precaution could damage the signal contacts.
-
Check that the lens is level when viewed from the side, and rotate the PL lock levers as shown in the figure to lock the lens.
Attaching the Support Frame
After removing the support frame of the PL-mount adapter cover, when attaching it to the PL-mount adapter cover again, align the indicator on the support frame and the mark on the PL-mount adapter cover and tighten the bolts using the supplied hex wrench (2 mm). When using a torque wrench, set the torque to 0.36 N·m.
When attaching the support frame to the mount adapter, align the indicator on the support frame and the mark on the mount adapter and tighten the bolts using the supplied hex wrench (2 mm). When using a torque wrench, set the torque to 0.36 N·m.